

If you’ve ever wanted to bring the rich flavors of East Africa into your kitchen, this Ethiopian Bread Recipe is the perfect place to start. Ethiopian bread is known for its unique texture, comforting flavor, and ability to complement a wide variety of savory dishes. Whether served alongside spicy stews, grilled meats, or vegetable dishes, this homemade bread offers a delicious taste of Ethiopian cuisine.
Unlike many everyday breads, Ethiopian bread can range from soft and fluffy to slightly chewy depending on the style you’re making. This recipe creates a simple homemade loaf that’s tender on the inside with a lightly golden crust, making it an excellent companion to traditional Ethiopian meals or even soups and curries.
Using basic pantry ingredients and straightforward techniques, you’ll have a flavorful homemade bread that’s perfect for beginners and experienced bakers alike.
Recipe Overview
- Category: Bread
- Cuisine: Ethiopian
- Servings: 8
- Prep Time: 20 minutes
- Rise Time: 1 hour 30 minutes
- Bake Time: 30 minutes
- Total Time: About 2 hours 20 minutes
What Is Ethiopian Bread?
Ethiopian bread comes in several varieties, with each region offering its own unique preparation and texture. The most famous Ethiopian bread is injera, a large fermented flatbread made from teff flour. However, Ethiopia is also home to other delicious breads that are baked or pan-cooked using wheat flour, making them softer and milder in flavor.
This Ethiopian bread recipe focuses on a soft homemade wheat bread that’s easy to prepare using ingredients commonly found in most kitchens. The bread has a light, fluffy interior and a tender crust, making it perfect for soaking up flavorful stews, enjoying with butter, or serving alongside your favorite Ethiopian-inspired dishes.
Why You’ll Love This Ethiopian Bread Recipe
This homemade Ethiopian bread is simple to make yet delivers authentic flavor and a wonderfully soft texture. It’s versatile enough to enjoy for breakfast, lunch, or dinner and pairs beautifully with both traditional Ethiopian dishes and everyday meals.
Here are a few reasons you’ll love this recipe:
- Soft and fluffy texture
- Easy for beginner bakers
- Made with simple pantry ingredients
- Perfect with soups and stews
- Delicious served warm
- Great for sandwiches
- Freezer-friendly
- Authentic homemade flavor
Ingredients
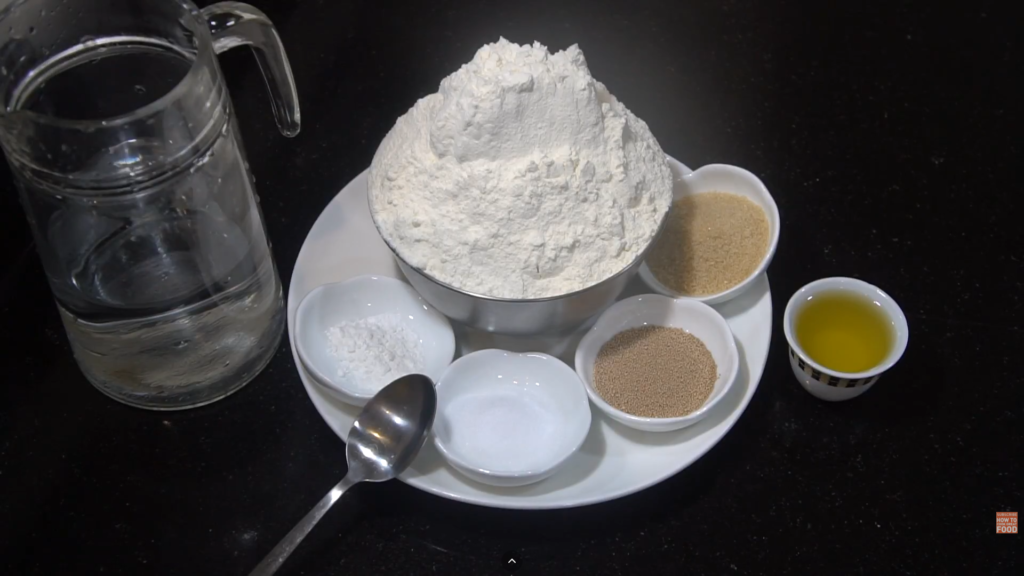
- 4 cups all-purpose flour
- 2¼ teaspoons active dry yeast (1 packet)
- 1¼ cups warm water (110°F/43°C)
- 2 tablespoons sugar
- 1 teaspoon salt
- 3 tablespoons olive oil or melted butter
- 2 tablespoons plain yogurt (optional, for a softer crumb)
- Butter for brushing after baking (optional)
Kitchen Equipment
You’ll need:
- Large mixing bowl
- Measuring cups and spoons
- Wooden spoon
- Dough scraper
- Clean kitchen towel
- 9×5-inch loaf pan or baking sheet
- Pastry brush
- Cooling rack
How to Make Ethiopian Bread
Step 1: Activate the Yeast
Pour the warm water into a large mixing bowl and stir in the sugar. Sprinkle the active dry yeast over the top and let it sit for about 5–10 minutes until the mixture becomes foamy.
A bubbly yeast mixture indicates that the yeast is active and ready to help the dough rise properly.
Step 2: Make the Dough
Add the olive oil (or melted butter), yogurt if using, salt, and about half of the flour to the yeast mixture.
Mix until a thick batter forms, then gradually add the remaining flour while stirring. Once the dough begins to come together, transfer it to a lightly floured surface and knead for 8–10 minutes until it becomes smooth, soft, and elastic.
Step 3: First Rise
Place the kneaded dough into a lightly greased bowl and turn it once so all sides are lightly coated.
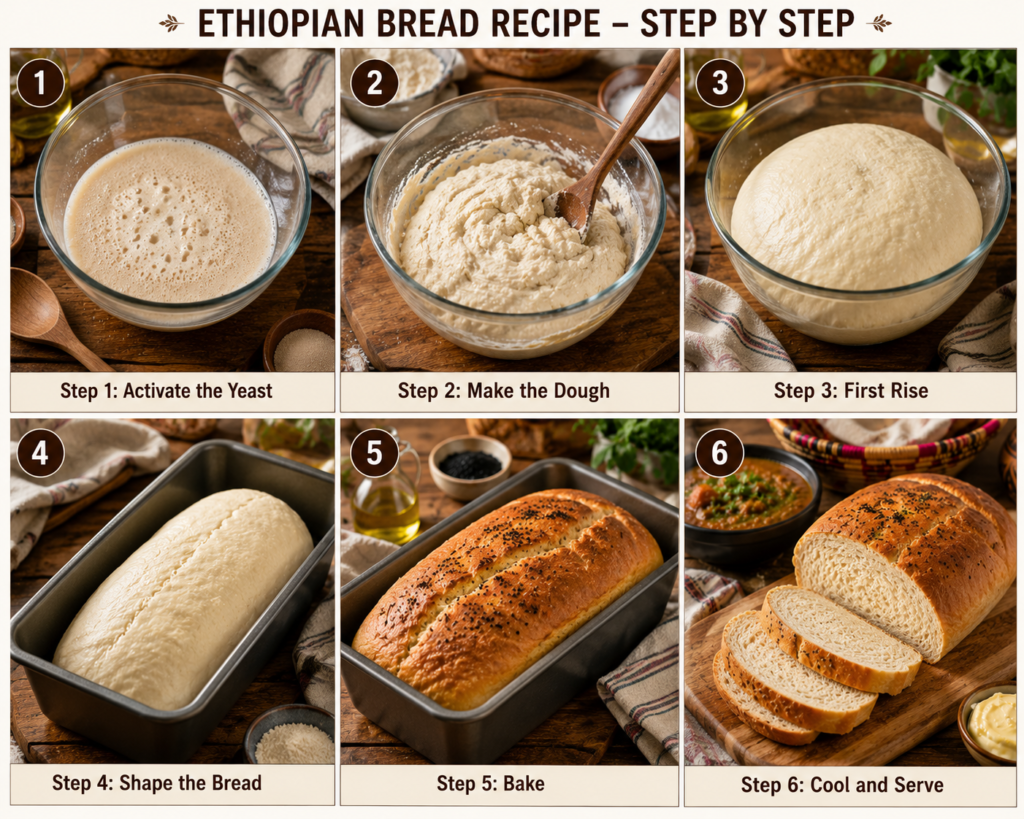
Cover the bowl with a clean kitchen towel or plastic wrap and let the dough rise in a warm place for about 1 to 1½ hours, or until it has doubled in size.
Step 4: Shape the Bread
Punch down the risen dough to release the air bubbles.
Shape it into a loaf or a round boule, depending on your preference, and place it into a greased loaf pan or onto a parchment-lined baking sheet.
Cover again and let it rise for another 30 minutes.
Step 5: Bake
Preheat your oven to 375°F (190°C).
Bake the bread for 28–30 minutes, or until the crust is golden brown and the loaf sounds hollow when tapped on the bottom. If desired, brush the hot bread with melted butter for a softer, shinier crust.
Step 6: Cool and Serve
Remove the bread from the oven and let it rest in the pan for about 10 minutes. Carefully transfer it to a wire rack and allow it to cool completely before slicing. Cooling helps the crumb set properly and makes slicing much easier.
Serve the bread warm with butter, honey, or jam for breakfast, or pair it with traditional Ethiopian stews, soups, curries, grilled meats, or roasted vegetables for a hearty meal.
Recipe Video
Expert Tips for the Best Ethiopian Bread Recipe
A few simple baking techniques can make a noticeable difference in the texture and flavor of your homemade bread.
- Measure the flour accurately using the spoon-and-level method.
- Use warm—not hot—water to activate the yeast.
- Knead the dough until it’s smooth and elastic.
- Allow the dough to rise in a warm, draft-free location.
- Don’t rush the rising process for the softest texture.
- Brush the loaf with melted butter after baking for a tender crust.
- Let the bread cool before slicing to prevent a gummy interior.
- Store leftovers in an airtight container to maintain freshness.
Delicious Variations
Whole Wheat Ethiopian Bread
Replace up to half of the all-purpose flour with whole wheat flour for a heartier loaf with added fiber.
Herb Bread
Mix chopped fresh rosemary, thyme, parsley, or cilantro into the dough for extra flavor.
Garlic Butter Bread
Brush the baked loaf with melted garlic butter and sprinkle with chopped parsley.
Honey Bread
Add an extra tablespoon of honey to the dough for a subtle sweetness that pairs beautifully with butter.
Sesame Seed Bread
Sprinkle sesame seeds over the loaf before baking for added texture and a nutty flavor.
What to Serve with Ethiopian Bread
This homemade bread complements many dishes, especially rich and flavorful meals.
- Ethiopian lentil stew (Misir Wat)
- Chickpea stew
- Vegetable curry
- Chicken stew
- Beef stew
- Roasted vegetables
- Lentil soup
- Tomato soup
- Butter and honey
- Fruit preserves
- Cheese platter
- Scrambled eggs
Storage & Reheating
Homemade bread stores well and can easily be enjoyed throughout the week.
Room Temperature
Store the cooled bread in an airtight container or bread bag for up to 3 days.
Refrigerator
For longer freshness, refrigerate the loaf for up to 1 week. Warm slices before serving for the best texture.
Freezer
Wrap the loaf or individual slices tightly in plastic wrap and place them in a freezer-safe bag. Freeze for up to 3 months.
Reheating
Warm slices in a toaster or oven at 300°F (150°C) for 5–8 minutes until soft and heated through.
Common Mistakes to Avoid
Using Water That’s Too Hot
Hot water can kill the yeast, preventing the dough from rising properly.
Adding Too Much Flour
Excess flour creates a dense, dry loaf. Add flour gradually until the dough is soft but not sticky.
Skipping the Kneading
Proper kneading develops gluten, giving the bread structure and a light texture.
Underproofing the Dough
Insufficient rising time results in a dense loaf with poor volume.
Slicing Too Soon
Cutting into hot bread releases steam and can leave the interior gummy.
Nutrition Information
| Nutrient | Amount (Per Serving) |
|---|---|
| Calories | 225 kcal |
| Protein | 6 g |
| Carbohydrates | 39 g |
| Fat | 5 g |
| Saturated Fat | 1 g |
| Cholesterol | 2 mg |
| Sodium | 295 mg |
| Fiber | 2 g |
| Sugar | 2 g |
| Calcium | 22 mg |
| Iron | 2 mg |
Nutrition values are approximate and may vary depending on the ingredients used.
Final Thoughts
This Ethiopian Bread Recipe is a simple and satisfying way to explore the rich traditions of Ethiopian-inspired baking. With its soft interior, lightly golden crust, and versatile flavor, it’s perfect for serving alongside hearty stews, soups, or enjoying with butter and honey.
Whether you’re discovering Ethiopian cuisine for the first time or adding a homemade bread to your baking repertoire, this recipe is easy to follow and delivers delicious results every time.
You may also like Slow Cooker Refried Beans Recipe.
Frequently Asked Questions
Can I make this bread without yogurt?
Yes. The yogurt is optional and simply helps create a softer crumb. You can omit it without affecting the recipe significantly.
Can I use instant yeast?
Yes. Instant yeast can be mixed directly with the dry ingredients and doesn’t require proofing first.
Can I make the dough ahead of time?
Absolutely. After the first rise, refrigerate the dough overnight and let it come to room temperature before shaping and baking.
Why didn’t my bread rise?
Inactive yeast, water that was too hot, or a cold environment are the most common reasons.
Can I freeze Ethiopian bread?
Yes. Wrap it tightly and freeze for up to three months. Thaw at room temperature before reheating.
Is this the same as injera?
No. Injera is a fermented flatbread traditionally made with teff flour. This recipe is for a soft wheat-based Ethiopian-style bread that’s easier to prepare with common pantry ingredients.
Recipe Card
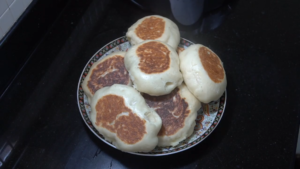
Ethiopian Bread Recipe
Ingredients
Equipment
Method
- Pour the warm water into a large mixing bowl and stir in the sugar. Sprinkle the active dry yeast over the top and let it sit for about 5–10 minutes until the mixture becomes foamy.
- A bubbly yeast mixture indicates that the yeast is active and ready to help the dough rise properly.
- Add the olive oil (or melted butter), yogurt if using, salt, and about half of the flour to the yeast mixture.
- Mix until a thick batter forms, then gradually add the remaining flour while stirring. Once the dough begins to come together, transfer it to a lightly floured surface and knead for 8–10 minutes until it becomes smooth, soft, and elastic.
- Place the kneaded dough into a lightly greased bowl and turn it once so all sides are lightly coated.
- Cover the bowl with a clean kitchen towel or plastic wrap and let the dough rise in a warm place for about 1 to 1½ hours, or until it has doubled in size.
- Punch down the risen dough to release the air bubbles.
- Shape it into a loaf or a round boule, depending on your preference, and place it into a greased loaf pan or onto a parchment-lined baking sheet.
- Cover again and let it rise for another 30 minutes.
- Preheat your oven to 375°F (190°C).
- Bake the bread for 28–30 minutes, or until the crust is golden brown and the loaf sounds hollow when tapped on the bottom. If desired, brush the hot bread with melted butter for a softer, shinier crust.
- Remove the bread from the oven and let it rest in the pan for about 10 minutes. Carefully transfer it to a wire rack and allow it to cool completely before slicing. Cooling helps the crumb set properly and makes slicing much easier.
- Serve the bread warm with butter, honey, or jam for breakfast, or pair it with traditional Ethiopian stews, soups, curries, grilled meats, or roasted vegetables for a hearty meal.
Video
Notes
- Ethiopian lentil stew (Misir Wat)
- Chickpea stew
- Vegetable curry
- Chicken stew
- Beef stew
- Roasted vegetables
- Lentil soup
- Tomato soup
- Butter and honey
- Fruit preserves
- Cheese platter
- Scrambled eggs

1 thought on “Ethiopian Bread Recipe”